WordPress 5.0版本正式发布/默认启用Gutenberg编辑器/利用Classic Editor插件恢复经典编辑器
WordPress 5.0+版本切换原来的经典编辑器方法
WordPress 5.0版本正式发布/默认启用Gutenberg编辑器/利用Classic Editor插件恢复经典编辑器
wordpress 定时发布失败|解决WordPress自动发布失败问题
关于wordpress定时发布失败问题,在网上找了一下解决方案。
其中调整timeout的值大于0.01和安装WP Missed Schedule插件解都测试了,不好用。
最有效的方法是直接把WP Missed Schedule里面的代码放到主题的functions.php文件中。
阅读详细 »
wordpress定时发布失败——修改方法
wordpress 发布文章的时候 设置 定时发送,发现通常会出现发布失败的现象。
最近发现wordpress定时发布老是失败,网上搜索了很多方法,一一试过了,很多对我来讲,都不适用!在这里盘点一下:
方法一:修改 /wp-includes/cron.php 文件代码,解决WordPress定时发布失败 测试失败
打开 /wp-includes/cron.php 文件
找到 wp_remote_post( $cron_url, array( ‘timeout’ => 0.01, ‘blocking’ => false, ‘sslverify’ => apply_filters( ‘https_local_ssl_verify’, true ) ) );
修改 timeout 时间 ,将 0.01 改成10 或者更大些就可以了
方法二 .安装WP Missed Schedule插件,解决WordPress定时发布失败 测试成功
直接在wordpress后台搜索即可安装,安装启动即可解决问题,无须任何的设置!
WP Missed Schedule插件下载地址:https://github.com/sLaNGjI/wp-missed-schedule
三. 在主题的 添加自动更新代码,解决WordPress定时发布失败 测试成功。
在主题文件夹创建 cron.php文件 代码如下:
<?php
//自动更新
//将文件保存cron.php 放到主题的inc目录下,然后functions.php文件中插入如下代码
//require get_template_directory() . '/cron.php';
//
//
if (!function_exists('add_action')) {
    header('Status 403 Forbidden');
    header('HTTP/1.0 403 Forbidden');
    header('HTTP/1.1 403 Forbidden');
    exit();
}
function wpms_log() {
    echo "\n<!--Plugin WP Missed Schedule 2011.0920.2011 Active-->";
}
add_action('wp_head', 'wpms_log');
add_action('wp_footer', 'wpms_log');
define('WPMS_DELAY', 5);
define('WPMS_OPTION', 'wp_missed_schedule');
function wpms_replace() {
    delete_option(WPMS_OPTION);
}
register_deactivation_hook(__FILE__, 'wpms_replace');
function wpms_init() {
    remove_action('publish_future_post', 'check_and_publish_future_post');
    $last = get_option(WPMS_OPTION, false);
    if (($last !== false) && ($last > (time() - (WPMS_DELAY * 60)))) return;
    update_option(WPMS_OPTION, time());
    global $wpdb;
    $scheduledIDs = $wpdb ->get_col("SELECT `ID` FROM `{$wpdb->posts}` WHERE(((`post_date`> 0) && (`post_date` <= CURRENT_TIMESTAMP())) OR ((`post_date_gmt`>0) && (`post_date_gmt` <= UTC_TIMESTAMP())) ) AND `post_status` = 'future' LIMIT 0,5");
    if (!count($scheduledIDs)) return;
    foreach($scheduledIDs as $scheduledID) {
        if (!$scheduledID) continue;
        wp_publish_post($scheduledID);
    }
}
add_action('init', 'wpms_init', 0);
然后在主题的 function.php 文件中加入如下代码
//自动更新
require get_template_directory() . '/cron.php';
This site requires Javascript to work, please enable Javascript in your brow
如果你是7.6版本的火车头 在获取栏目是返回This site requires Javascript to work, please enable Javascript in your brow
火车头获取栏目时返回This site requires Javascript to work, please enable Javascript in your brow
阅读详细 »
WordPress主题自动显示文章第一张图片代码
在修改主题的时候,我们可能需要WordPress自动获取文章第一张图片,在博客吧看到了相关的实现方法,记录一下,估计以后也用得到。
在当前使用的主题模板的functions.php文件<?php和?>之前添加以下代码
   function catch_that_image() {
      global $post, $posts;
      $first_img = '';
      ob_start();
      ob_end_clean();
      $output = preg_match_all('/<img.+src=[\'"]([^\'"]+)[\'"].*>/i', $post->post_content, $matches);
      $first_img = $matches [1] [0];
      if(empty($first_img)){ //Defines a default image
        $first_img = "/images/default.jpg";
      }
      return $first_img;
    }
在当前主题模板的index.php文件的内容代码前或后添加以下代码
<?php echo catch_that_image() ?>
<?php if( $picurl = catch_first_image() ) :  ?>
<img width="100%" height="auto" src="<?php echo $picurl; ?>" class="attachment-post-thumbnail size-post-thumbnail wp-post-image" alt=""/>
<?php endif; ?>
WordPress 模板常用调用函数
WordPress 基本模板文件

一套完整的 WordPress 模板应至少具有如下文件:

style.css : CSS(样式表)文件
index.php : 主页模板
archive.php : Archive/Category模板
404.php : Not Found 错误页模板
comments.php : 留言/回复模板
footer.php : Footer模板
header.php : Header模板
sidebar.php : 侧栏模板

page.php : 内容页(Page)模板
single.php : 内容页(Post)模板
searchform.php : 搜索表单模板
search.php : 搜索结果模板

当然,具体到特定的某款模板,可能不止这些文件,但一般而言,这些文件是每套模板所必备的。

基本条件判断

is_home() : 是否为主页
is_single() : 是否为内容页(Post)
is_page() : 是否为内容页(Page)
is_category() : 是否为Category/Archive页
is_tag() : 是否为Tag存档页
is_date() : 是否为指定日期存档页
is_year() : 是否为指定年份存档页
is_month() : 是否为指定月份存档页
is_day() : 是否为指定日存档页
is_time() : 是否为指定时间存档页
is_archive() : 是否为存档页
is_search() : 是否为搜索结果页
is_404() : 是否为 “HTTP 404: Not Found” 错误页
is_paged() : 主页/Category/Archive页是否以多页显示

Header 部分常用到的 PHP 函数

<?php bloginfo('name'); ?> : 博客名称(Title)
<?php bloginfo('stylesheet_url'); ?> : CSS文件路径
<?php bloginfo('pingback_url'); ?> : PingBack Url
<?php bloginfo('template_url'); ?> : 模板文件路径
<?php bloginfo('version'); ?> : WordPress版本
<?php bloginfo('atom_url'); ?> : Atom Url
<?php bloginfo('rss2_url'); ?> : RSS 2.o Url
<?php bloginfo('url'); ?> : 博客 Url
<?php bloginfo('html_type'); ?> : 博客网页Html类型
<?php bloginfo('charset'); ?> : 博客网页编码
<?php bloginfo('description'); ?> : 博客描述
<?php wp_title(); ?> : 特定内容页(Post/Page)的标题

模板常用的 PHP 函数及命令

<?php get_header(); ?> : 调用Header模板
<?php get_sidebar(); ?> : 调用Sidebar模板
<?php get_footer(); ?> : 调用Footer模板
<?php the_content(); ?> : 显示内容(Post/Page)
<?php if(have_posts()) : ?> : 检查是否存在Post/Page
<?php while(have_posts()) : the_post(); ?> : 如果存在Post/Page则予以显示
<?php endwhile; ?> : While 结束
<?php endif; ?> : If 结束
<?php the_time('字符串') ?> : 显示时间,时间格式由“字符串”参数决定,具体参考PHP手册
<?php comments_popup_link(); ?> : 正文中的留言链接。如果使用 comments_popup_script() ,则留言会在新窗口中打开,反之,则在当前窗口打开
<?php the_title(); ?> : 内容页(Post/Page)标题
<?php the_permalink() ?> : 内容页(Post/Page) Url
<?php the_category(',') ?> : 特定内容页(Post/Page)所属Category
<?php the_author(); ?> : 作者
<?php the_ID(); ?> : 特定内容页(Post/Page) ID
<?php edit_post_link(); ?> : 如果用户已登录并具有权限,显示编辑链接
<?php get_links_list(); ?> : 显示Blogroll中的链接
<?php comments_template(); ?> : 调用留言/回复模板
<?php wp_list_pages(); ?> : 显示Page列表
<?php wp_list_categories(); ?> : 显示Categories列表
<?php next_post_link(' %link'); ?> : 下一篇文章链接
<?php previous_post_link('%link'); ?> : 上一篇文章链接
<?php get_calendar(); ?> : 日历
<?php wp_get_archives() ?> : 显示内容存档
<?php posts_nav_link(); ?> : 导航,显示上一篇/下一篇文章链接
<?php include(TEMPLATEPATH .'/文件名'); ?> : 嵌入其他文件,可为定制的模板或其他类型文件

与模板相关的其他函数

<?php _e('Message'); ?> : 输出相应信息
<?php wp_register(); ?> : 显示注册链接
<?php wp_loginout(); ?> : 显示登录/注销链接
<!--nextpage--> : 将当前内容分页
<!--more--> : 将当前内容截断,以不在主页/目录页显示全部内容
<?php timer_stop(1); ?> : 网页加载时间(秒)
<?php echo get_num_queries(); ?> : 网页加载查询量
WordPress:wpdb类、$wpdb变量以及数据库操作函数
WordPress为用户提供了一个数据库操作的类——wpdb,该类包含了一系列具体的数据库操作函数(insert, update, query, …),这使我们可以非常便捷地操作WordPress数据库(创建表,查询,删除,更新等),它是基于ezSQL(由Justin Vincent维护的数据库操作项目)编写而成。
但是,我们不能直接调用wpdb类中的方法,WordPress为我们定义了一个全局变量$wpdb来访问WordPress数据库,该全局变量就是wpdb类的一个实例,我们就通过$wpdb这个全局变量,来调用wpdb类中的方法,实现对WordPress数据库的各种操作。(注意:在自定义函数中使用$wpdb之前,必须先全局化$wpdb。)
$wpdb对象可以用来操作WordPress数据库中的每一个表,不仅仅是WordPress自动创建的基本表。例如,你有一个自定义的表叫做mytable,那么可以使用如下语句来查询:
$myrows = $wpdb->get_results(“SELECT id, name FROM mytable”);
插入数据时,可以使用insert()函数。例如:
$table = "test_table";
$data_array = array(
        'column_1' => 'data1',
        'column_2' => 'data2'
);
$wpdb->insert($table, $data_array);
更新数据时,可以使用update()函数。例如:
$table = "test_table";
$data_array = array(
        'column_1' => 'new_data1'
);
$where_clause = array(
        'column_2' => 'data2'
);
$wpdb->update($table, $data_array, $where_clause);
读取数据时,有很多种方法,其中一种如下:
$querystr = "SELECT column_1 FROM test_table";
$results = $wpdb->get_results($querystr);
$i = 0;
while ($i < count($results)) {
echo $results[$i]->column_1 . "<br />";
$i++;
}
关于WordPress数据库操作函数的索引:
$wpdb->query('query');

$wpdb->get_var('query', column_offset, row_offset);

$wpdb->get_row('query', output_type, row_offset);

$wpdb->get_col('query', column_offset);

$wpdb->get_results('query', output_type);

$wpdb->insert($table, $data, $format);

$wpdb->update($table, $data, $where, $format = null, $where_format = null);

$wpdb->prepare('query' [, value_parameter, value_parameter ... ]);

$wpdb->show_errors();

$wpdb->hide_errors();

$wpdb->print_error();

$wpdb->get_col_info('type', offset);

$wpdb->flush();
WordPress过滤器(Filters):apply_filters和add_filter
过滤器(Filters)对于WordPress来说是非常重要的,它极大地扩展了WordPress的定制能力,提高了WordPress的灵活性。无论是制作主题还是开发插件,我们基本上都会或多或少地使用到过滤器,以实现我们的一些特殊需求。
其实,WordPress过滤器的使用非常简单,我们经常用到的也就两个函数而已,它们就是apply_filters和add_filter。本文将对WordPress过滤器进行详细解读与分析。
什么是过滤器?
下面就来说说什么是过滤器(Filters),过滤器就是注册到过滤器钩子(Filter Hook)的函数,过滤器钩子都有一个名字,在WordPress中,一般使用变量$tag来标识这个名字。所有挂接到过滤器钩子上的函数都是过滤器。
过滤器钩子和动作钩子一样,基本的函数有两个,动作钩子有do_action函数,它就有apply_filters函数,该函数是用于执行相应的过滤器函数,不同的是动作钩子仅仅是执行函数(或者称为动作,更为贴切),而过滤器钩子它要做的是通过执行过滤器函数来改变对象或变量的值,就相当于对变量或者对象进行过滤,然后再返回。
过滤器钩子相关函数:
简单地说,动作钩子要的是过程(仅仅执行代码块)而不是结果(输出值/返回值),过滤器钩子要的是结果而不是过程。apply_filters()函数的用法:
<?php
    apply_filters( $tag, $value, $var ... );
    //$tag 必需,过滤器钩子的名称
    //$value 必需,可以被过滤器函数修改的值
    //$var 可选,若干个可以传递给过滤器函数的参数
?>
同理,动作钩子有个函数是add_action,相应地,过滤器钩子也有个函数是add_filter。这两个函数的用法就完全一样了,实质上,add_action就是直接调用add_filter来实现的。add_filter函数的用法:
<?php
    add_filter( $tag, $function_to_add, $priority, $accepted_args );
    //$tag 必需,过滤器钩子的名称
    //$function_to_add 必需,要添加的过滤器函数
    //$priority 可选,过滤器函数的优先级,默认值为10
    //$accepted_args 可选,过滤器函数接受的参数数量,默认值为1
?>
要注意的是,我们在前面说过,过滤器(过滤器函数)的任务是要改变对象或变量的值,所以通过add_filter函数添加的过滤器必须要有个返回值,也就是函数$function_to_add必需有返回值。
过滤器应用实例:
我们以wp_title()函数为例,为大家讲一下过滤器的实际用法,这个函数的定义在wp-includes/general-template.php文件中。在该函数的定义中,调用了apply_filters函数来执行相应的过滤器函数。代码如下:
$title = apply_filters(‘wp_title’, $title, $sep, $seplocation);
//这里会执行过滤器函数,对变量$title进行过滤
//正因为这行代码的存在,你可以把你的过滤器函数添加进来,实现对$title的定制
那么,我们可以在该过滤器钩子(wp_title)上添加一个过滤器来改变$title的值。代码如下:
<?php
    add_filter('wp_title', 'mytitle');
    //把函数mytitle挂接到过滤器钩子wp_title上
    //定义过滤器函数mytitle
    function mytitle($title) {
        $title = 'This is a demo.';
        return $title;
    }
?>
上面这些代码就会把wp_title()函数的返回值$title改为“This is a demo.”,调用wp_title()函数得到的输出就是“This is a demo.”了,不管在什么页面调用都是如此。把这段代码添加到主题的functions.php文件中,你就能看到效果了(如果你的主题使用了wp_title函数)。
通过本文的介绍,相信大家都明白了什么是过滤器以及过滤器的用法。
参考手册:
http://codex.wordpress.org/Function_Reference/apply_filters
WordPress的数据库操作类ezSQL
WordPress的数据库操作类ezSQL。
ezSQL是一个非常好用的PHP数据库操作类。著名的开源博客WordPress的数据库操作就使用了ezSQL的MySQL部分。该数据库操作类支持几乎所有主流的数据库,如:PHP-PDO, mySQL, Oracle, InterBase/FireBird, PostgreSQL, SQLite以及MS-SQL等。ezSQL具有很强的调试功能,可以快速地查看SQL代码的执行情况。使用ezSQL,可以为我们节省开发时间、简化代码并提高运行效率。
ezSQL的优点就不用多说了,它小巧、快速、简单、易用、并且开源。还有就是安全,你没想到的细节它都为你考虑了。你只需要在你的脚本开头包含相关的PHP文件,然后你就可以使用更好用的一套ezSQL函数来代替标准的PHP数据库操作函数。
下面是ezSQL中一些主要的函数:
$db->get_results — 从数据库中读取数据集。
$db->get_row — 从数据库中读取一行数据。
$db->get_col — 从数据库中读取一列指定的数据集。
$db->get_var — 从数据库的数据集中读取一个值。
$db->query — 执行一条SQL语句。
$db->debug — 打印最后执行的SQL语句及其返回的结果。
$db->vardump — 打印变量的结构及其内容。
$db->select — 选择一个新数据库。
$db->get_col_info — 获取列的信息。
$db->hide_errors — 隐藏错误。
$db->show_errors — 显示错误。
ezSQL的使用方法很简单,首先下载ezSQL源代码,然后将ez_sql_core.php文件和ez_sql_mysql.php文件(这里以mySQL为例)放到与你的脚本文件相同的目录下,然后将下面的代码添加到你的脚本文件的最前面,这样就可以正常使用ezSQL了。
<?php
// 包含ezSQL的核心文件
include_once "ez_sql_core.php";

// 包含ezSQL具体的数据库文件,这里以mySQL为例
include_once "ez_sql_mysql.php";

// 初始化数据库对象并建立数据库连接
$db = new ezSQL_mysql('db_user','db_password','db_name','db_host');
?>
下面是ezSQL中一些主要函数的应用实例,这些代码均来自于ezSQL的官方帮助文档。
实例一:
// Select multiple records from the database and print them out..
$users = $db->get_results("SELECT name, email FROM users");
foreach ( $users as $user ) {
            // Access data using object syntax
            echo $user->name;
            echo $user->email;
}
实例二:
// Get one row from the database and print it out..
$user = $db->get_row("SELECT name,email FROM users WHERE id = 2");
echo $user->name;
echo $user->email;
实例三:
$var = $db->get_var(“SELECT count(*) FROM users”);echo $var;
// Get one variable from the database and print it out..
$var = $db->get_var("SELECT count(*) FROM users");
echo $var;
实例四:
// Insert into the database
$db->query("INSERT INTO users (id, name, email) VALUES (NULL,'justin','jv@foo.com')");
实例五:
// Update the database
$db->query("UPDATE users SET name = 'Justin' WHERE id = 2)");
实例六:
// Display last query and all associated results
$db->debug();
实例七:
// Display the structure and contents of any result(s) .. or any variable
$results = $db->get_results("SELECT name, email FROM users");
$db->vardump($results);
实例八:
// Get 'one column' (based on column index) and print it out..
$names = $db->get_col("SELECT name,email FROM users",0)
foreach ( $names as $name ) {
    echo $name;
}
实例九:
// Same as above ‘but quicker’
foreach ( $db->get_col("SELECT name,email FROM users",0) as $name ) {
    echo $name;
}
实例十:
// Map out the full schema of any given database and print it out..
$db->select("my_database");
foreach ( $db->get_col("SHOW TABLES",0) as $table_name ) {
    $db->debug();
    $db->get_results("DESC $table_name");
}
$db->debug();
WordPress数据库操作函数详解
为了便于访问数据库,WordPress提供了一个友好的数据库操作类:wpdb,该类定义在/wp-includes/wp-db.php文件中。wpdb类封装了所有的数据库操作函数,它是基于开源的数据库操作类ezSQL进行修改的,使其更适合于WordPress,也使其仅适用于mySQL数据库。同时,WordPress还提供了一个全局变量$wpdb,并将其实例化为wpdb类的对象。这样我们就可以直接使用$wpdb来调用所有的数据库操作函数。
通过这个$wpdb对象,我们可以对WordPress数据库进行任何操作,包括建表、查询、删除、更新等。要注意的是,如果要在自定义函数中使用$wpdb,必须先将其全局化(global $wpdb;)。
下面就详细介绍一下WordPress的数据库操作函数:
1、function query($query)
这个函数是最基本的数据库操作函数,$query为SQL语句,提交给数据库执行,结果分两种情况:
1). 如果是“insert|delete|update|replace”, 返回受影响行数,在“insert|replace”这种情况下,该函数会用$this->insert_id记录下新插入的ID。
2). 如果是“select”,该函数会用$this->last_result记录下查询到结果集,返回查询到的记录行数。
如果出错,则返回FALSE。
实例:
<?php
$wpdb->query(
    "
    UPDATE $wpdb->posts
    SET post_parent = 7
    WHERE ID = 15 AND post_status = 'static'
    "
);
?>
2、function escape($data)
使用反斜线引用数据,也就是使用魔术引号。
实例:
<?php
$name = $wpdb->escape($name);
$email = $wpdb->escape($email);
$wpdb->query("INSERT INTO myusers (id, name, email) VALUES (NULL, '$name', '$email')");
?>
3、function insert($table, $data, $format = null)
这是插入记录函数,第一个参数是表的字段数组,第二个是数据数组,第三个用于规定$data中每个值的数据类型。插入数据返回1,否则为0。
实例:
<?php
$wpdb->insert(
    'table',
    array(
        'column1' => 'value1',
        'column2' => 123
    ),
    array(
        '%s',
        '%d'
    )
);
?>
4、function update($table, $data, $where, $format = null, $where_format = null)
这是更新记录函数,第一个参数是表的字段数组,第二个是数据数组,第三个是条件数组,第四个和第五个分别用于规定$data和$where中每个值的数据类型。更新了为1,否则为0。
实例:
<?php
$wpdb->update(
    'table',
    array(
        'column1' => 'value1',  // string
        'column2' => 'value2'   // integer (number)
    ),
    array( 'ID' => 1 ),
    array(
        '%s',   // value1
        '%d'    // value2
    ),
    array( '%d' )
);
?>
5、function get_var($query = null, $x = 0, $y = 0)
这个函数只返回一个值,默认是第0行第0列。如果$query不为空,首先执行查询,如果$query为空的话,则表示从cache中选出;然后返回第X列第Y行的值。
实例:
<?php
$user_count = $wpdb->get_var( $wpdb->prepare( "SELECT COUNT(*) FROM $wpdb->users;" ) );
echo "<p>User count is {$user_count}</p>";
?>
6、function get_row($query = null, $output = OBJECT, $y = 0)
返回一行,$output指定返回的类型,可以是ARRAY_A(关联数组)、ARRAY_N(数字数组)或者OBJECT(对象)。$y指定第几行。
实例:
默认情况下,$output的值为OBJECT,那么用法如下:
<?php
$mylink = $wpdb->get_row("SELECT * FROM $wpdb->links WHERE link_id = 10");
echo $mylink->link_id; // prints "10"
?>
如果$output的值为ARRAY_A,那么用法如下:
<?php
$mylink = $wpdb->get_row("SELECT * FROM $wpdb->links WHERE link_id = 10", ARRAY_A);
echo $mylink['link_id']; // prints "10"
?>
如果$output的值为ARRAY_N,那么用法如下:
<?php
$mylink = $wpdb->get_row("SELECT * FROM $wpdb->links WHERE link_id = 10", ARRAY_N);
echo $mylink[1]; // prints "10"
?>
7、function get_col($query = null, $x = 0)
返回一列,$x指定第几列。
实例:
<?php
$names = $wpdb->get_col("SELECT name, email FROM myusers", 0)
foreach ( $names as $name ) {
    echo $name;
}
?>
8、function get_results($query = null, $output = OBJECT)
返回查询的结果集,允许以ARRAY_A、ARRAY_N或者OBJECT三种方式返回。
实例:
<?php
$fivesdrafts = $wpdb->get_results(
    "
    SELECT ID, post_title
    FROM $wpdb->posts
    WHERE post_status = 'draft'
        AND post_author = 5
    "
);

foreach ( $fivesdrafts as $fivesdraft )
{
    echo $fivesdraft->post_title;
}
?>
9、function get_col_info($info_type = ‘name’, $col_offset = -1)
返回字段信息。
实例:
<?php
$col_name = $wpdb->get_col_info('name', 0);
echo $col_name;
?>
10、function prepare($query = null)
这是一个可变参数函数,即函数的参数个数不确定。$query为SQL语句,其中可以包含像%s和%d这样的占位符,其它所有非占位符里面的%都要使用%%来代替。由于SQL语句中可能含有像单引号、双引号这样的特殊字符,如果不进行处理就直接提交给数据库,可能会导致错误或者出现安全问题。为此,我们可以通过prepare函数来对SQL语句进行预处理。其实该函数的用法非常简单,就跟C语言中的sprintf()和vsprintf()函数差不多。
用法:
<?php $sql = $wpdb->prepare( 'query' [, value_parameter, value_parameter ... ] ); ?>
实例:
<?php
$metakey    = "Harriet's Adages";
$metavalue  = "WordPress' database interface is like Sunday Morning: Easy.";

$wpdb->query( $wpdb->prepare(
    "
        INSERT INTO $wpdb->postmeta
        ( post_id, meta_key, meta_value )
        VALUES ( %d, %s, %s )
    ",
    10,
    $metakey,
    $metavalue
) );
?>
当然,还有一些不常使用的函数,这里就不详细介绍了。另外还有两个常量:SAVEQUERIES和WP_DEBUG。设置SAVEQUERIES常量为TRUE,可以把在数据库里执行的所有查询及其停止时间保存到$this->queries这个数组中,以后调试的时候可以使用;而设置WP_DEBUG常量为TRUE,则可以输出错误。不过,这两个常量开关默认都没有打开,我们在测试的时候,可以在wp_config.php文件中将其开启。
WordPress下特殊英文字符变成中文字符的解决办法
我们在WordPress后台编辑器里编辑文章时,经常会碰到一些特殊的英文符号(半角)被强制转换成了中文编码的全角符号了(如:单引号、双引号、连字符等)。我们在后台的可视化状态浏览是正常的,但是我们到前台网页去浏览时就变样儿了。
这个问题会给我们造成很大的困扰,特别是文章中存在代码时,这个问题会让人非常恼火;一方面这会使代码看起来不美观,另一方面还可能误导浏览者,同时修改起来也非常麻烦。这一切都是WordPress太过“智能”惹的祸,默认情况下,它会调用函数wptexturize来执行这个转换。
解决这个问题的方法有两种:
一、直接修改函数wptexturize
打开wp-includes目录里面的formatting.php文件,定位到以下这几行代码:
$curl = str_replace($static_characters, $static_replacements, $curl);
// regular expressions
$curl = preg_replace($dynamic_characters, $dynamic_replacements, $curl);
将这两行语句都注释掉,如下:
// $curl = str_replace($static_characters, $static_replacements, $curl);
// regular expressions
// $curl = preg_replace($dynamic_characters, $dynamic_replacements, $curl);
二、调用remove_filter函数来移除WordPress对wptexturize的调用
这是最简单的方法,在主题目录下的functions.php文件中添加如下代码即可。
<?php
remove_filter('the_title', 'wptexturize');
remove_filter('the_excerpt', 'wptexturize');
remove_filter('the_content', 'wptexturize');
?>
当然,原则上不要去修改WordPress本身的文件,因为这会比较麻烦,同时每次更新版本的时候都要去修改代码,实在是不可取。因此,建议使用第二种方法。
WordPress的文章分页功能
制作WordPress主题的时候,你是否添加了一个文章分页功能,有一些主题本身没有集成这个功能,当然WordPress本身就有文章的分页功能,非常好用,免去了使用插件的麻烦。
使用方法:
1、在文章中需要分页的地方插入以下标记(编辑器必须先切换到HTML状态下):
<!--nextpage-->
2、检查当前所使用的模版文件single.php中是否调用了函数link_pages(),在WP的默认模版中是有这个函数调用的,但是有些模版没有。如果没有,你就需要在该文件中找到如下代码:
<?php the_content(); ?>
3、然后在上面找到的代码的后面添加如下代码:
<?php link_pages('<p><strong>分页:</strong> ', '</p>', 'number'); ?>
wp_link_pages()函数具有同样的功能,关于这两个函数的使用区别,请参见WordPress的官方网页。
WordPress:使用the_excerpt函数显示摘要信息
WordPress为我们提供了显示摘要信息的函数the_excerpt(),该函数用于输出文章的摘要,如果你没有为文章提供明确的摘要(后台文章编辑器的可选摘要区域),它将自动摘取文章内容中前55个字作为摘要,从文章中摘取的这段摘要不会有任何的HTML标签和图片。此函数必须用在循环里面。
该函数的用法如下:
<?php the_excerpt(); ?>
为了让显示的摘要信息符合我们的口味,我们可以对摘要信息进行定制,根据我们的需求,把如下的相应代码添加到主题的functions.php文件即可。
1、修改摘要信息的长度
默认情况下,摘要(excerpt)信息的长度设置为55个字,可以使用excerpt_length过滤器钩子改变摘要(excerpt)的长度,代码如下:
<?php
function new_excerpt_length($length) {
    return 150;
}
add_filter('excerpt_length', 'new_excerpt_length');
?>
2、修改摘要信息末尾附加的字符串
摘要(excerpt)信息末尾附加的字符串默认设置为“[…]”。为了修改摘要信息末尾附加的字符串,可以使用excerpt_more过滤器钩子来进行定制,代码如下:
<?php
function new_excerpt_more($more) {
    return '...';
}
add_filter('excerpt_more', 'new_excerpt_more');
?>
3、在摘要信息的末尾添加“阅读更多”的链接
可以在摘要信息的末尾添加“阅读更多”的链接,这个需求可以和上面的第二个需求合并在一起,代码如下:
<?php
function new_excerpt_more($more) {
global $post;
return ‘…[<a target=”_blank” href=”‘ . get_permalink($post->ID) . ‘”>阅读更多</a>]’;
}
add_filter(‘excerpt_more’, ‘new_excerpt_more’);
?>
当然,以上这些代码只是针对那些没有明确提供摘要的文章才会有效,也就是说,只有当the_excerpt函数自动摘取文章前面的部分内容作为摘要时才会有效。
wordpress远程图片文件自动本地化
使用过百度ueditor编辑器插件的小伙伴一定会发现,ueditor编辑器会自动把外链的原创图片抓取到本地,并且使用本地的图片链接来显示在网站上,这个对于很多怕外链图片不稳定又不愿意自己下载上传图片的小伙伴来说简直就是神器~,可是呢不使用ueditor小伙伴就享受不到这个神器般的功能,正好在某老外博客看到一篇远程图片自动本地化的代码小V这就立即分享给大家,代码如下:
add_filter('content_save_pre', 'auto_save_image');
function auto_save_image($content) {
    $upload_path = '';
    $upload_url_path = get_bloginfo('url');
    //上传目录
    if (($var = get_option('upload_path')) != '') {
        $upload_path = $var;
    } else {
        $upload_path = 'wp-content/uploads';
    }
    if (get_option('uploads_use_yearmonth_folders')) {
        $upload_path.= '/' . date("Y", time()) . '/' . date("m", time());
    }
    //文件地址
    if (($var = get_option('upload_url_path')) != '') {
        $upload_url_path = $var;
    } else {
        $upload_url_path = bloginfo('url');
    }
    if (get_option('uploads_use_yearmonth_folders')) {
        $upload_url_path.= '/' . date("Y", time()) . '/' . date("m", time());
    }
    require_once ("../wp-includes/class-snoopy.php");
    $snoopy_Auto_Save_Image = new Snoopy;
    $img = array();
    //以文章的标题作为图片的标题
    if (!empty($_REQUEST['post_title'])) $post_title = wp_specialchars(stripslashes($_REQUEST['post_title']));
    $text = stripslashes($content);
    if (get_magic_quotes_gpc()) $text = stripslashes($text);
    preg_match_all("/ src=(\"|\'){0,}(http:\/\/(.+?))(\"|\'|\s)/is", $text, $img);
    $img = array_unique(dhtmlspecialchars($img[2]));
    foreach ($img as $key => $value) {
        set_time_limit(180); //每个图片最长允许下载时间,秒
        if (str_replace(get_bloginfo('url') , "", $value) == $value && str_replace(get_bloginfo('home') , "", $value) == $value) {
            //判断是否是本地图片,如果不是,则保存到服务器
            $fileext = substr(strrchr($value, '.') , 1);
            $fileext = strtolower($fileext);
            if ($fileext == "" || strlen($fileext) > 4) $fileext = "jpg";
            $savefiletype = array(
                'jpg',
                'gif',
                'png',
                'bmp'
            );
            if (in_array($fileext, $savefiletype)) {
                if ($snoopy_Auto_Save_Image->fetch($value)) {
                    $get_file = $snoopy_Auto_Save_Image->results;
                } else {
                    echo "error fetching file: " . $snoopy_Auto_Save_Image->error . "<br>";
                    echo "error url: " . $value;
                    die();
                }
                $filetime = time();
                $filepath = "/" . $upload_path; //图片保存的路径目录
                !is_dir(".." . $filepath) ? mkdirs(".." . $filepath) : null;
                //$filename = date("His",$filetime).random(3);
                $filename = substr($value, strrpos($value, '/') , strrpos($value, '.') - strrpos($value, '/'));
                //$e = '../'.$filepath.$filename.'.'.$fileext;
                //if(!is_file($e)) {
                // copy(htmlspecialchars_decode($value),$e);
                //}
                $fp = @fopen(".." . $filepath . $filename . "." . $fileext, "w");
                @fwrite($fp, $get_file);
                fclose($fp);
                $wp_filetype = wp_check_filetype($filename . "." . $fileext, false);
                $type = $wp_filetype['type'];
                $post_id = (int)$_POST['temp_ID2'];
                $title = $post_title;
                $url = $upload_url_path . $filename . "." . $fileext;
                $file = $_SERVER['DOCUMENT_ROOT'] . $filepath . $filename . "." . $fileext;
                //添加数据库记录
                $attachment = array(
                    'post_type' => 'attachment',
                    'post_mime_type' => $type,
                    'guid' => $url,
                    'post_parent' => $post_id,
                    'post_title' => $title,
                    'post_content' => '',
                );
                $id = wp_insert_attachment($attachment, $file, $post_parent);
                $text = str_replace($value, $url, $text); //替换文章里面的图片地址

            }
        }
    }
    $content = AddSlashes($text);
    remove_filter('content_save_pre', 'auto_save_image');
    return $content;
}
function mkdirs($dir) {
    if (!is_dir($dir)) {
        mkdirs(dirname($dir));
        mkdir($dir);
    }
    return;
}
function dhtmlspecialchars($string) {
    if (is_array($string)) {
        foreach ($string as $key => $val) {
            $string[$key] = dhtmlspecialchars($val);
        }
    } else {
        $string = str_replace('&', '&', $string);
        $string = str_replace('"', '"', $string);
        $string = str_replace('<', '<', $string);
        $string = str_replace('>', '>', $string);
        $string = preg_replace('/&(#\d;)/', '&\1', $string);
    }
    return $string;
}
将次代码写入主题的functions.php文件或者是functions.php的引入文件中即可,以后每当在wordpress发布文章时如果文章中含有外链图片就会自动本地化了,无需任何设置操作非常方便。
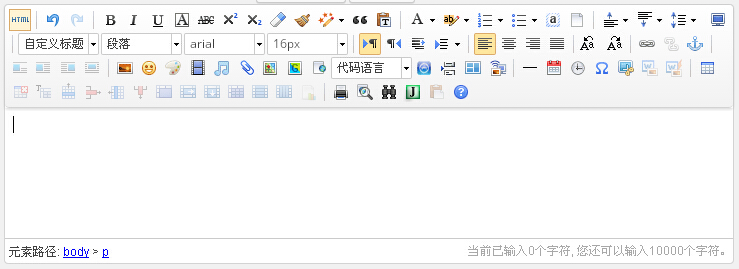
wordpress富文本编辑器插件 :kindeditor-for-wordpress
wordpress文本编辑器插件 :kindeditor-for-wordpress
官方网站:http://kindeditor.net/down.php
下载地址:
kindeditor-for-wordpress-master1.4.zip
http://pan.baidu.com/s/1kTGbub9
————————————————————————-
kindeditor-for-wordpress1.4.2.zip
————————————————————————-
kindeditor-for-wordpress1.3.7.zip
http://pan.baidu.com/s/1eQcVQSE
————————————————————————-
kindeditor-for-wordpress1.3.7.rar
百度富文本编辑器ueditor for wordpress | wordpress 百度富文本编辑器插件wp-ueditor 下载
百度富文本编辑器ueditor for wordpress | wordpress 百度富文本编辑器插件wp-ueditor 下载
下载地址: http://pan.baidu.com/s/1eQs4i1k